
For a quick introduction, watch UCL's video guide to getting started with the VPN.
You will need the VPN client installed on your device. All UCL devices have this pre-installed, but for your own device follow the instructions at https://www.ucl.ac.uk/isd/how-to/connecting-to-ucl-vpn-microsoft-windows
- Open the Cisco AnyConnect Secure Mobility Client from the Windows Start menu
- In the server address box, enter vpn.ucl.ac.uk and click Connect

- You will be prompted for your username and password via the UCL Microsoft login. This will be your full userID e-mail, e.g. [email protected], and your normal UCL password.
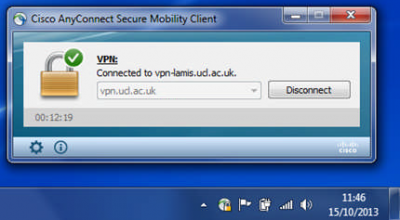
- When successfully logged in, the client will connect you to the UCL VPN service and a connected icon (Fig.8) will be displayed in the task tray (Fig.9) You will now be able to access services (e.g. MyHR and MyFinance) that are not available outside the UCL network.

- To disconnect the VPN, click the Disconnect button
- When the VPN client has disconnected, the VPN icon in the task tray will appear like this:

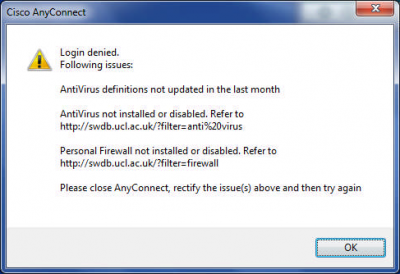
If you do not have an active anti-virus and firewall installed, you will see the following Login denied prompt (Fig.7) You will need to rectify these issues, then attempt to login to the client again.
Having issues?
- Restart your computer.
- Click on Cisco AnyConnect then a small window will pop up.
- On the window showing vpn.ucl.ac.uk do not click connect - instead copy and paste the following:
vpn.ucl.ac.uk/Prelogin
- Then click Connect.
- Another window will pop up type your [email protected], password then click OK.
Then vpn connection should be established. If the issue still persists please call the ISD service desk as they might need to access your PC remotely to investigate your issue.
Knowledge base
Category
- Office IT